TypeScript Learning Adventures: A Tale of Love and Hate - Node.js and TypeScript
You can use TypeScript to build Node.js applications. Also of course in conjunction with the popular Express.js framework. Or any other frameworks like Koa, Meteor, Nest, and others.

You can use TypeScript to build Node.js applications. Also of course in conjunction with the popular Express.js framework. Or any other frameworks like Koa, Meteor, Nest, and others.
Node.js on its own is not capable of executing TypeScript. Still, you can use TypeScript to write Node.js scripts. In this article, I will show you an example of a very simple TypeScript REST API on the server side with Node.js and Express framework.
How does TypeScript work in Node.js?
Let's create an index.ts file. In there, let's write some code that we wanna execute with Node.js, but also use TypeScript.
A simple script could be that we console log something:
console.log("Hello world");This works in the browser, and this also works with Node.js.
You could execute this file if you compile it to JavaScript. So if I run tsc index.ts command, and I produce my index.js file, I can execute this with a Node.js with the command node index.js
Now when I delete the index.js file and I try to execute index.ts with Node.js, we see that this also works. So is Node.js capable of executing TypeScript?
No! It is not and that's important to know.
Node.js doesn't care about the file extension. Whatever it finds in the file, Node.js treats it as regular JavaScript. As our script above doesn't use any TypeScript features, it works fine.
That changes if we add different content:
const name: string = "Mensur";
console.log(name);
This of course is a valid TypeScript code, but if we try to execute this with Node.js, we get an error.
So Node.js is not capable of parsing and compiling TypeScript. It treats every file you execute with it as JavaScript. And if you're not using any TypeScript features in the file, yes then it does work. But if you do, it won't work.
You always have to compile the TypeScript file to JavaScript first. Then you can execute the JavaScript file. That's important to understand.
Node.js does not execute TypeScript!

You can actually install a package called ts-node. Which gives you that TypeScript compiler, combined with the node executable. You can install that tool globally, which you can use to run TypeScript files.
But behind the scenes, it will then do the compilation for you and execute the compiled code. So it combines the tsc and the node step into one step.
So, it is a package you could use for the development phase. For production, serving your files on some web server, this is not ideal. Because having this extra compilation step every time your code gets executed, adds a bit of extra overhead.
This is fine during development, but you don't want it when your code is production ready. You want to build it and serve it somewhere and that's it.
So in this article, we'll not use ts-node and we'll not try to execute any TypeScript files with Node.js.
Instead, I will show you a setup that you can use to build a Node.js express web application. Or better to say, simple TypeScript REST API with the TypeScript compiler and vanilla Node.js.
Node.js project setup
Now, you might think that we need a complex setup but we actually don't. We'll use the tsc command to compile our files. And then, we can use the node command to execute our compiled files. That's all we need here.
Still, I will walk you through the setup of a project here. With npm init, we create a Node.js project and we get a package.json file. We will also install some third-party packages like Express.js. And I also wanna install one extra tool that simplifies our development process.
So run:
npm initin any empty folder of your choice.
You can confirm all the default settings here in the command prompt. After that, you'll have a package.json file which should look something like this:
{
  "name": "typescript-node-starter",
  "version": "1.0.0",
  "description": "",
  "main": "index.js",
  "scripts": {
    "test": "echo \"Error: no test specified\" && exit 1"
  },
  "author": "",
  "license": "ISC"
}
After that, also run:
tsc --initto initialize this project as a TypeScript so that you get this tsconfig.json file. We will make a few tweaks to the tsconfig.json file, so it will look like this:
{
  "compilerOptions": {
    "target": "es2018",
    "module": "commonjs",
    "moduleResolution": "node",
    "outDir": "./dist",
    "rootDir": "./src",
    "strict": true,
    "esModuleInterop": true,
    "forceConsistentCasingInFileNames": true
  }
}
Here are the explanations:
target- can be set toes2018, depending on the Node.js version you're using. But if you're using the latest one, it supports modern JavaScript syntax,module- can stay atcommonjs,moduleResolution- this tells the TypeScript how your different files and imports will work together. And we need to set this to make sure that everything works in Node.js exports and modules.outDir- set it todist, where the actual JavaScript files after compilation will be located,rootDir- set it tosrc, because we want to separate the TypeScript source code from the rest of the scripts,strict- we will use strict mode which enables a set of strict type-checking options. This helps us catch more potential errors during the developmentesModuleInterop- allows interoperability between CommonJS and ES6 module formats. This is done by enabling default imports for CommonJS modules.forceConsistentCasingInFileNames- ensures that file name references in the code must match the exact casing of the file. promoting consistent casing.
Of course, we will also create dist and src folders inside our root folder. In the last article, I described everything about this step in the last article about TypeScript compiler.
And since we'll build a simple web server and we wanna use Express.js, we will install some dependencies
npm install --save express http-status-codes uuidThis will install 3 dependencies:
express- the Express framework for Node.jshttp-status-codes- HTTP status codes library so we don't need to hardcode themuuid- a small library for generating unique IDs
As far as the development dependencies go, we will install only one:
npm install --save-dev nodemonNodemon is a tool that allows us to execute scripts with Node.js. The difference is that it then watches for changes in the file and the folder the file is in, as well as all subfolders. Whenever a file changes, it will restart the Node.js server.

This will speed up development because it will restart our Node.js application server every time we change the source code.
In normal development, we need to restart the server when the code changes. Because otherwise, our server still runs on the old code. Manually restarting is annoying so we can speed this up with Nodemon.
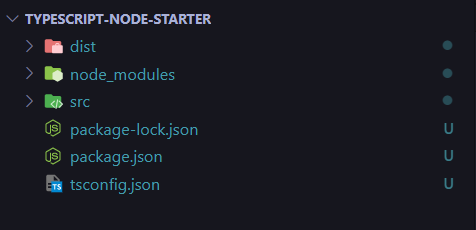
That's everything we need to get as the setup of the project goes. Here is how it looks in the VS Code:
Working with types in Node.js
Let's add minimal code to index.ts where we will spin up our server:
const express = require("express");
const server = express();
const PORT = 5000;
server.listen(PORT, () => console.log(`Server up and running on port ${PORT}`));
Now you know how we can add Express here and set up a web server with Express.
We import Express with this syntax here and then we can execute Express as a function. We get back a server object, on which we can call listen on a certain port for incoming requests.
Now this would work in normal JavaScript, but you already see we are getting an error here. Now I also get a suggestion why be getting this error here:
Cannot find name 'require'. Do you need to install type definitions for node? Try `npm i --save-dev @types/node`because require is actually a function that exists in Node.js, but not on the browser side.
Now in the tsconfig.json file we are not using any special libs that would support Node.js. So TypeScript is not aware of this general function that exists in a Node.js environment.
Now to make this work, we need to install extra types with:
npm install --save-dev @types/node If we hover over the server variable we see that TypeScript doesn't know what's in there. It's of type "any".
So we should also install "@types/express" to install express-specific types. We can do this with:
npm install --save-dev @types/expressIf you check now for auto-completion, it still doesn't work.
Why?
Well, the reason for that is the import syntax we're using here. This is the regular common.js import syntax that Node.js uses by default. We're in a TypeScript environment where we can use a different import syntax.
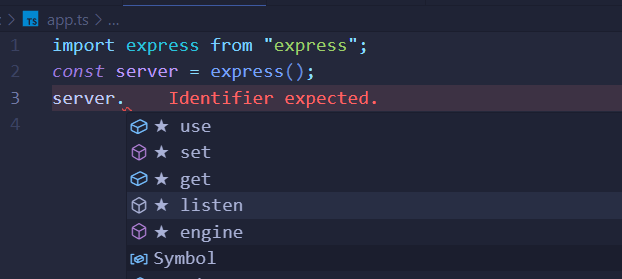
We can use the same import syntax we know from ES modules in the browser:
import express from "express";
const server = express();
const PORT = 5000;
server.listen(PORT, () => console.log(`Server up and running on port ${PORT}`));
and now finally, auto-completion works:
The final step would be to add a script command in our package.json:
"scripts": {
    "start": "nodemon dist/index.js"
 }
Then we can enter watch mode with tsc -w in one terminal so it compiles our code and stays in watch mode. In another terminal window we can run this command:
npm run startThis will finally spin up our server:
> node-typescript-starter-project@1.0.0 start
> nodemon dist/index.js

[nodemon] 3.0.1
[nodemon] to restart at any time, enter `rs`
[nodemon] watching path(s): *.*
[nodemon] watching extensions: js,mjs,cjs,json
[nodemon] starting `node dist/index.js`
Server up and running on port 5000
Middleware, controllers, body parsing
We want to build a very simple rest API and we will go for the book reading manager app.

This app is for book lovers can manage their reading list. Users can:
- add books they want to read
- edit books
- delete books
- mark books as read
We want to build a very simple rest API. For that, I will create a new sub-folder in the src folder, that I'll name routes. In there, I will add a file that should handle a certain set of routes of this rest API.
So here, we'll add my book routes by adding a books.ts file in the routes folder. In there, we want to use Express.js to register some routes:
import { Router } from "express";

const router = Router();
router.post("/");
router.get("/");
router.patch("/:id");
router.delete("/:id");

export default router;
We haven't set up any function that would execute when a request reaches these routes/endpoints. But we at least now know which routes we want, we'll add the functions in a second step later.
For now, let's connect the router here, and the configured routes to our running server here in index.ts:
import express from "express";
import bookRoutes from "./routes/books";

const server = express();
server.use("/book", bookRoutes);

const PORT = 5000;
server.listen(PORT, () => console.log(`Server up and running on port ${PORT}`));
We want to forward all requests that start with /book to our bookRoutes. so requests targeting a different URL will not be handled there.
Speaking of handling, we can also set up a middleware that will handle errors. So any errors that might occur anywhere in our code.
We do this with app.use syntax. Then we set up such a typical middleware function where we get the request, response, and a next function:
import express, { Request, Response, NextFunction } from "express";
import { StatusCodes } from "http-status-codes";
import bookRoutes from "./routes/books";

const server = express();
server.use("/books", bookRoutes);

server.use((err: Error, req: Request, res: Response, next: NextFunction) => {
  res.status(StatusCodes.INTERNAL_SERVER_ERROR).json({ message: err.message });
});

const PORT = 5000;
server.listen(PORT, () => console.log(`Server up and running on port ${PORT}`));
So this is a function that takes four parameters. Notice also how types for all these parameters are defined:
err- an object that represents occurred errorreq- an object that represents an incoming requestres- an object that represents the outgoing responsenext- a function that we can execute to let the request continue its journey to the next middleware in line
That's our error-handling middleware. It will fire whenever we have an error in one of our other middlewares.
In there, we return a simple object with an error message and HTTP status code 500. This code means the server failed to fulfill a valid request.
CRUD operations
Now to add some functionality to our app, we will create 2 folders:
controllers- where we hold our controller scriptsmodels- where we will hold our defined models
First, we can create a book.ts file with a book model in the models folder:
export class Book {
  constructor(
    public id: string,
    public title: string,
    public writer: string,
    public isRead: boolean = false,
  ) {}
}
This class will represent a single book instance in our app. It holds the following properties:
id- unique book identifiertitle- book titlewriter- book authorisRead- true/false property to mark the book as read, false by default

As you can see we also used a constructor shorthand to define these properties. We don't have to specify properties one by one.
Now to our app logic, we can add the following code to controllers/book.ts:
import { RequestHandler } from "express";
import { StatusCodes } from "http-status-codes";
import { v4 as uuidv4 } from "uuid";
import { Book } from "../models/book";

const booksDatabase: Book[] = [];

interface TypedRequestBody<T> extends Express.Request {
  body: T;
}

interface BookRequestBody {
    title?: string;
    writer?: string;
    isRead?: boolean;
}
interface BookRequestParams {
    id?: string;
}

export const createBook: RequestHandler = (
  req: TypedRequestBody<BookRequestBody>,
  res,
  next
) => {
  const { title, writer } = req.body;
  if (!title || !writer) {
    res
      .status(StatusCodes.BAD_REQUEST)
      .json({ message: "Title and writer are required fields!" });
    return;
  }

  const id = uuidv4();
  const newBook = new Book(id, title, writer);
  booksDatabase.push(newBook);

  res
    .status(StatusCodes.OK)
    .json({ message: "Book saved successfully", book: newBook });
};
Now let's explain this code a bit.
After imports, we define our custom TypedRequestBody type. We use it in combination with the BookRequestBody interface.
This is important because, without it, TypeScript doesn't know how our request body looks. And without it, we would need to do something like this:
const title = (req.body as {title?: string}).title;This is not pretty so the custom type for the request body is much more elegant.
You might also notice the RequestHandler type used. This type is a substitute for this:
const createBook: RequestHandler = (
  req: Express.Request,
  res: Express.Response,
  next: Express.NextFunction,
)
So to avoid specifying each type, we can use the RequestHandler type.
The rest of the code is pretty simple. After some simple error handling, we extract the title and writer from the request body. Then we generate a new unique ID for the book, and save it to the "database". For the sake of simplicity, we use an in-memory array and not a real database.
Now we need to update our routes/books.ts file so it uses this function to create a book:
import { Router } from "express";
import { createBook } from "../controllers/books";

const router = Router();
router.post("/", createBook);
router.get("/");
router.patch("/:id");
router.delete("/:id");

export default router;
One last detail that we need to add to our index.ts file. We need to set our server to use express.json() to be able to parse request bodies:
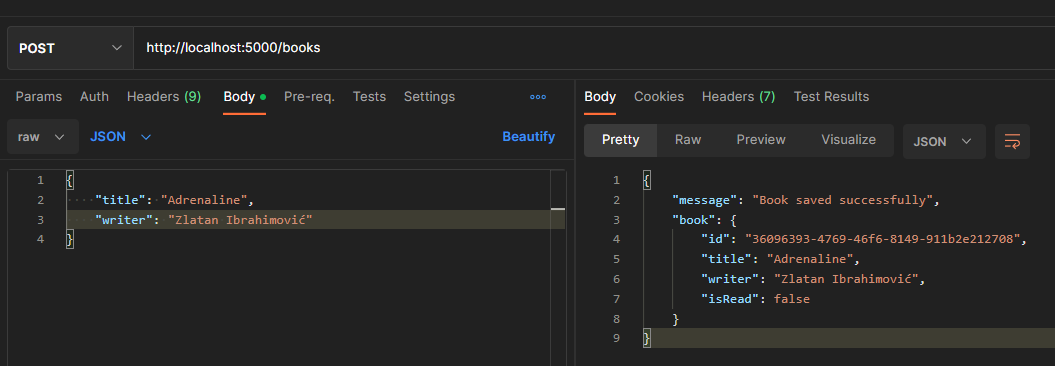
server.use(express.json());If we try to test the creation of the book in Postman, we can see that it works:
The rest of the functions are easy. Here is a function to list all books:
export const getBooks: RequestHandler = (req, res, next) => {
    res.json({ books: booksDatabase });
};
We are returning the data from our array. In the real project, this would be a query to the database.
Here is a function for updating a single book:
export const updateBook: RequestHandler<{ id: string }> = (
    req: TypedRequestBody<BookRequestBody, BookRequestParams>, res, next) => {
    const bookId = req.params.id;
    if (!bookId) {
        res
            .status(StatusCodes.BAD_REQUEST)
            .json({ message: "Book ID is required parameter!" });
        return;
    }

    const bookIndex = booksDatabase.findIndex(book => book.id === bookId);
    if (bookIndex < 0) {
        throw new Error('Book not found!');
    }

    const { title, writer, isRead } = req.body;
    const newTitle = title || booksDatabase[bookIndex].title;
    const newWriter = writer || booksDatabase[bookIndex].writer;
    const newIsRead = isRead || booksDatabase[bookIndex].isRead;
    booksDatabase[bookIndex] = new Book(bookId, newTitle, newWriter, newIsRead);

    res.json({ message: 'Book updated successfully!', updatedBook: booksDatabase[bookIndex] });
};
This is a bit more code, but it is not complex.
Like in createBook function, we are using TypedRequestBody type. Then some error handling follows as here we must know bookID before we can update it. If it's missing we can't update it.
Then we try to find the book by the ID and also handle the errors if the book is not found.
We know that the user can pass both title and writer values to update the book. Users can also pass only one property, a title. In that case, we use an existing value for the writer's property. The same goes for vice-versa.
Finally, we update the book in the array and return the updated book in response.
Last but not least is the deleteBook function:
export const deleteBook: RequestHandler = (req, res, next) => {
    const bookId = req.params.id;
    if (!bookId) {
        res
            .status(StatusCodes.BAD_REQUEST)
            .json({ message: "Book ID is required parameter!" });
        return;
    }

    const todoIndex = booksDatabase.findIndex(book => book.id === bookId);
    if (todoIndex < 0) {
        throw new Error('Book not found!');
    }
    booksDatabase.splice(todoIndex, 1);

    res.json({ message: 'Book successfully deleted!' });
};
Like updateBook, this function is only different as it removes the object from the array. The user must pass the book ID and the book by that ID must exist in the array.
The last step is to update the routes.ts file:
import { Router } from "express";
import { createBook, getBooks, updateBook, deleteBook } from "../controllers/books";

const router = Router();
router.post("/", createBook);
router.get("/", getBooks);
router.patch("/:id", updateBook);
router.delete("/:id", deleteBook);

export default router;
And that's it. You can find the full project code here.
Conclusion
In this article, you learned how you can use TypeScript in the Node.js express application. That you can install extra types for Express and for Node.js. For example, to get TypeScript support in your files.
That you write the application as you would always write it. For example, your import and export syntax differs. And you can use types, and any other TypeScript feature you learned so far.
You could use interfaces, decorators, generics, enums, and everything that's TypeScript exclusive.
That all works here because we're writing a regular TypeScript application. It gets compiled with the TypeScript compiler to regular Javascript code.


Comments ()